The Evolution of SLR Focusing Mechanisms
In the early days of the SLR camera, its parallax-free viewfinder experience won the hearts of many photographers. The sharpness of the image on the focus screen directly indicated focus accuracy. Yet, anyone who has handled vintage cameras knows the struggle: judging focus on a ground glass screen is notoriously difficult. Developing a precise focusing system became a long-standing challenge for every manufacturer.
The classic focusing screen—with its central split-image prism, surrounding microprism collar, and outer matte field—became the gold standard for manual-focus SLRs. Yet the early evolution of these screens was anything but straightforward.
Some camera designers sought to improve focus clarity by increasing viewfinder magnification. But higher magnification required shorter eyepiece focal lengths, resulting in punishingly short eye relief—a dealbreaker for bespectacled photographers. This technological impasse ultimately ushered in the split-image focusing screen’s rise to prominence.
While many embraced this simple, intuitive focusing method, criticisms emerged: certain subjects stubbornly resisted clear focus confirmation on split-prism screens. Meanwhile, achieving true 1:1 magnification typically demanded bulky 5X loupes with complex four-element optics—hardly conducive to nimble fieldwork.
Japanese manufacturers promptly addressed this with microprism focusing screens. These screens, incorporating numerous “miniature split-image” structures in the central area, gained rapid popularity for their broader applicability across photographic subjects.
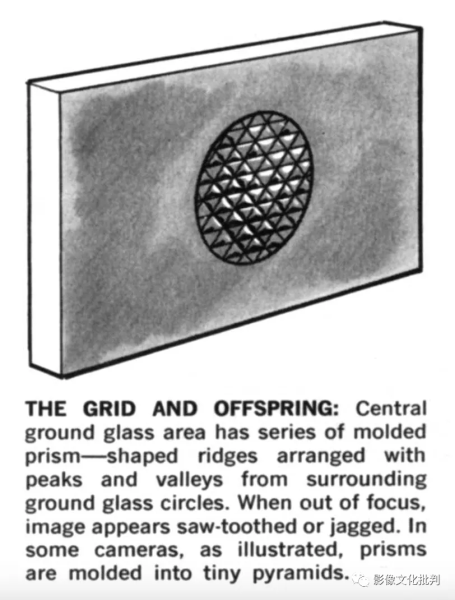
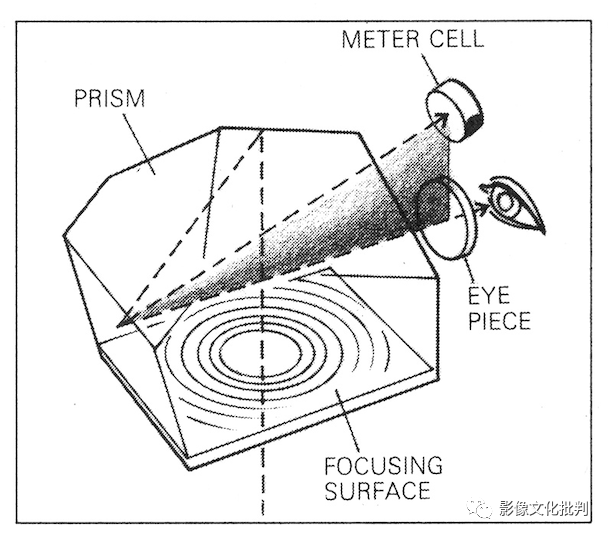
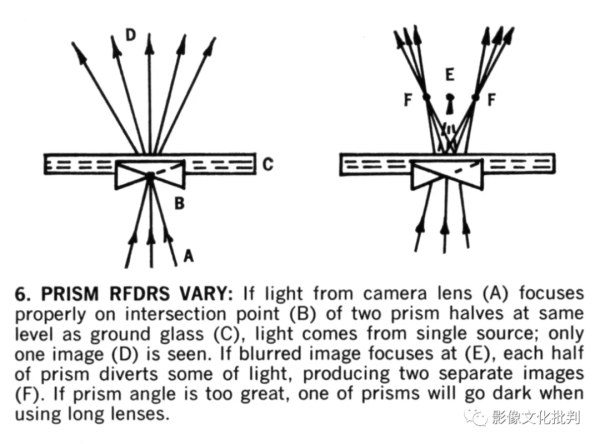
Microprism Focusing Screen Schematic
Both split-image and microprism focusing screens had inherent limitations. While they performed adequately with fast standard lenses, telephoto and small-aperture lenses caused their focus areas to darken significantly. The narrower light beams couldn’t fully or accurately cover the entire split-image or microprism zone (though microprisms were slightly less affected).
Another critical issue was viewfinder focus precision. Typically, 0.02mm accuracy was required (a key benchmark in many film camera tests) to confirm proper focus alignment. This demanded focusing screen textures significantly finer than this measurement – yet not so fine as to approach smooth glass, which would make focus confirmation impossible.
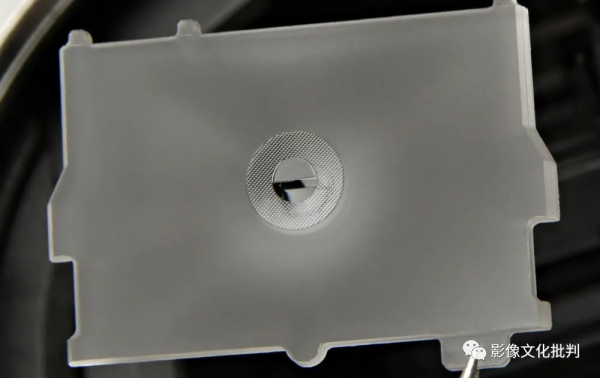
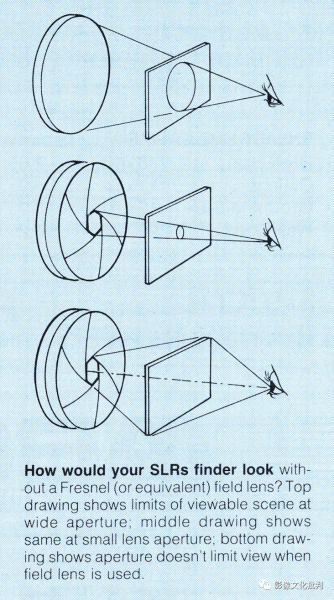
Early Fresnel lenses failed to gain popularity due to complaints about their pronounced ridges creating uncomfortable viewing experiences. While later Japanese SLRs solved this through precision manufacturing, the early Exakta cameras offered an intriguing solution: a plastic film on the condenser plane embedded with countless microscopic convex lenses. This design – resembling an ultra-fine microprism screen – improved focus judgment while scattering light evenly to maintain viewfinder brightness, effectively aiding both composition and focus.
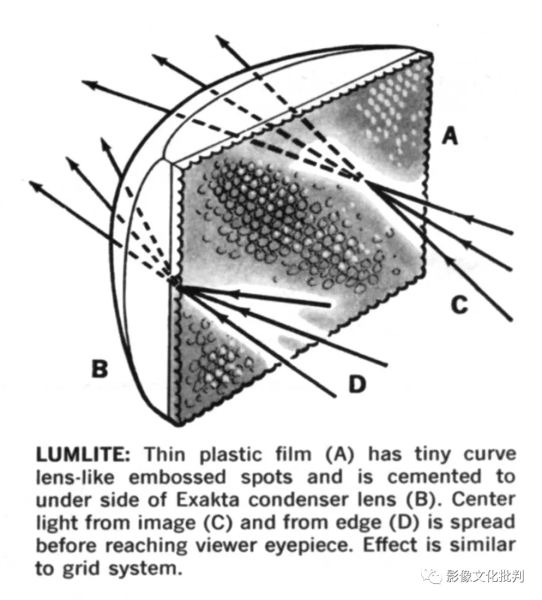
The Exakta Viewfinder’s Focusing Screen (Integrated Condenser & Corrector) This ingenious design utilized a plastic film that created a subtle “fractured” appearance in out-of-focus states. The key innovation lay in its minimally-textured convex lenses – even when used with a 5x viewfinder magnifier, these microscopic elements remained unobtrusive while maintaining optimal viewfinder brightness.
Exakta’s groundbreaking concept was later adopted and refined by Japanese camera manufacturers. Through meticulous optimization of the textured patterns on the plastic films, companies like Minolta eventually developed superior high-brightness focusing screens and viewfinder systems.
However, the quest for perfect focusing solutions continued. German engineer Josef Dahl observed that photographers often “racked” the focus ring back and forth to find optimal sharpness. His innovative solution divided the focusing screen into three distinct zones – foreground, middle ground, and background. When all three zones appeared equally sharp, precise focus was achieved. While this design didn’t necessarily speed up focusing, it did provide improved accuracy in certain shooting scenarios.
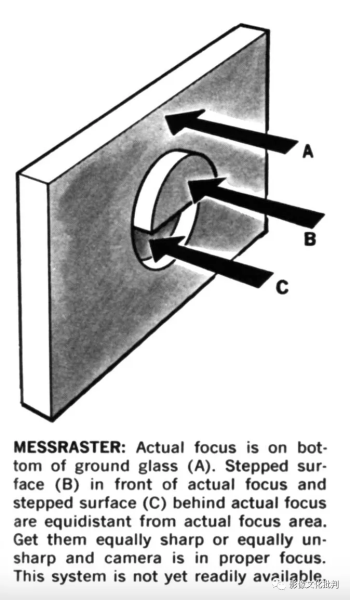
Josef Dahl’s Tri-Zone Focusing Screen Design
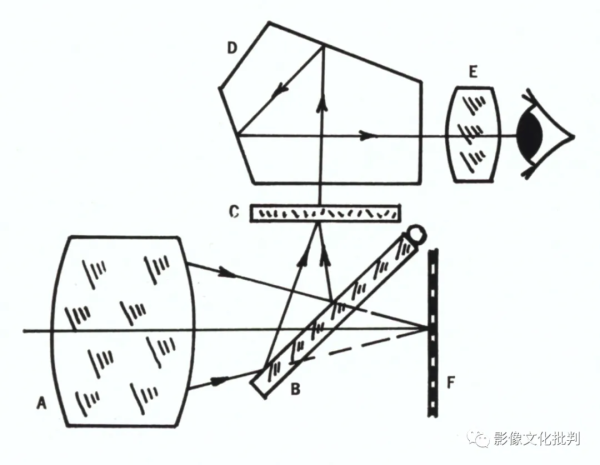
Where Josef’s solution was unconventional, Alpa Reflex implemented a truly distinctive approach. The system projected a rangefinder’s coincident image patch into the viewfinder while displaying the focusing indicator at the top of the frame.
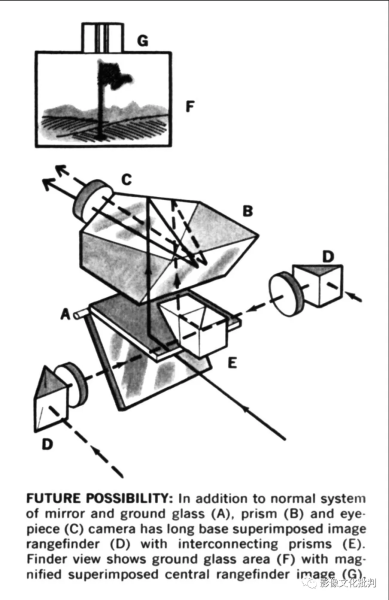
Alpa Reflex’s Combined Rangefinder Patch & Pentaprism System
Where does the error in SLR cameras come from?
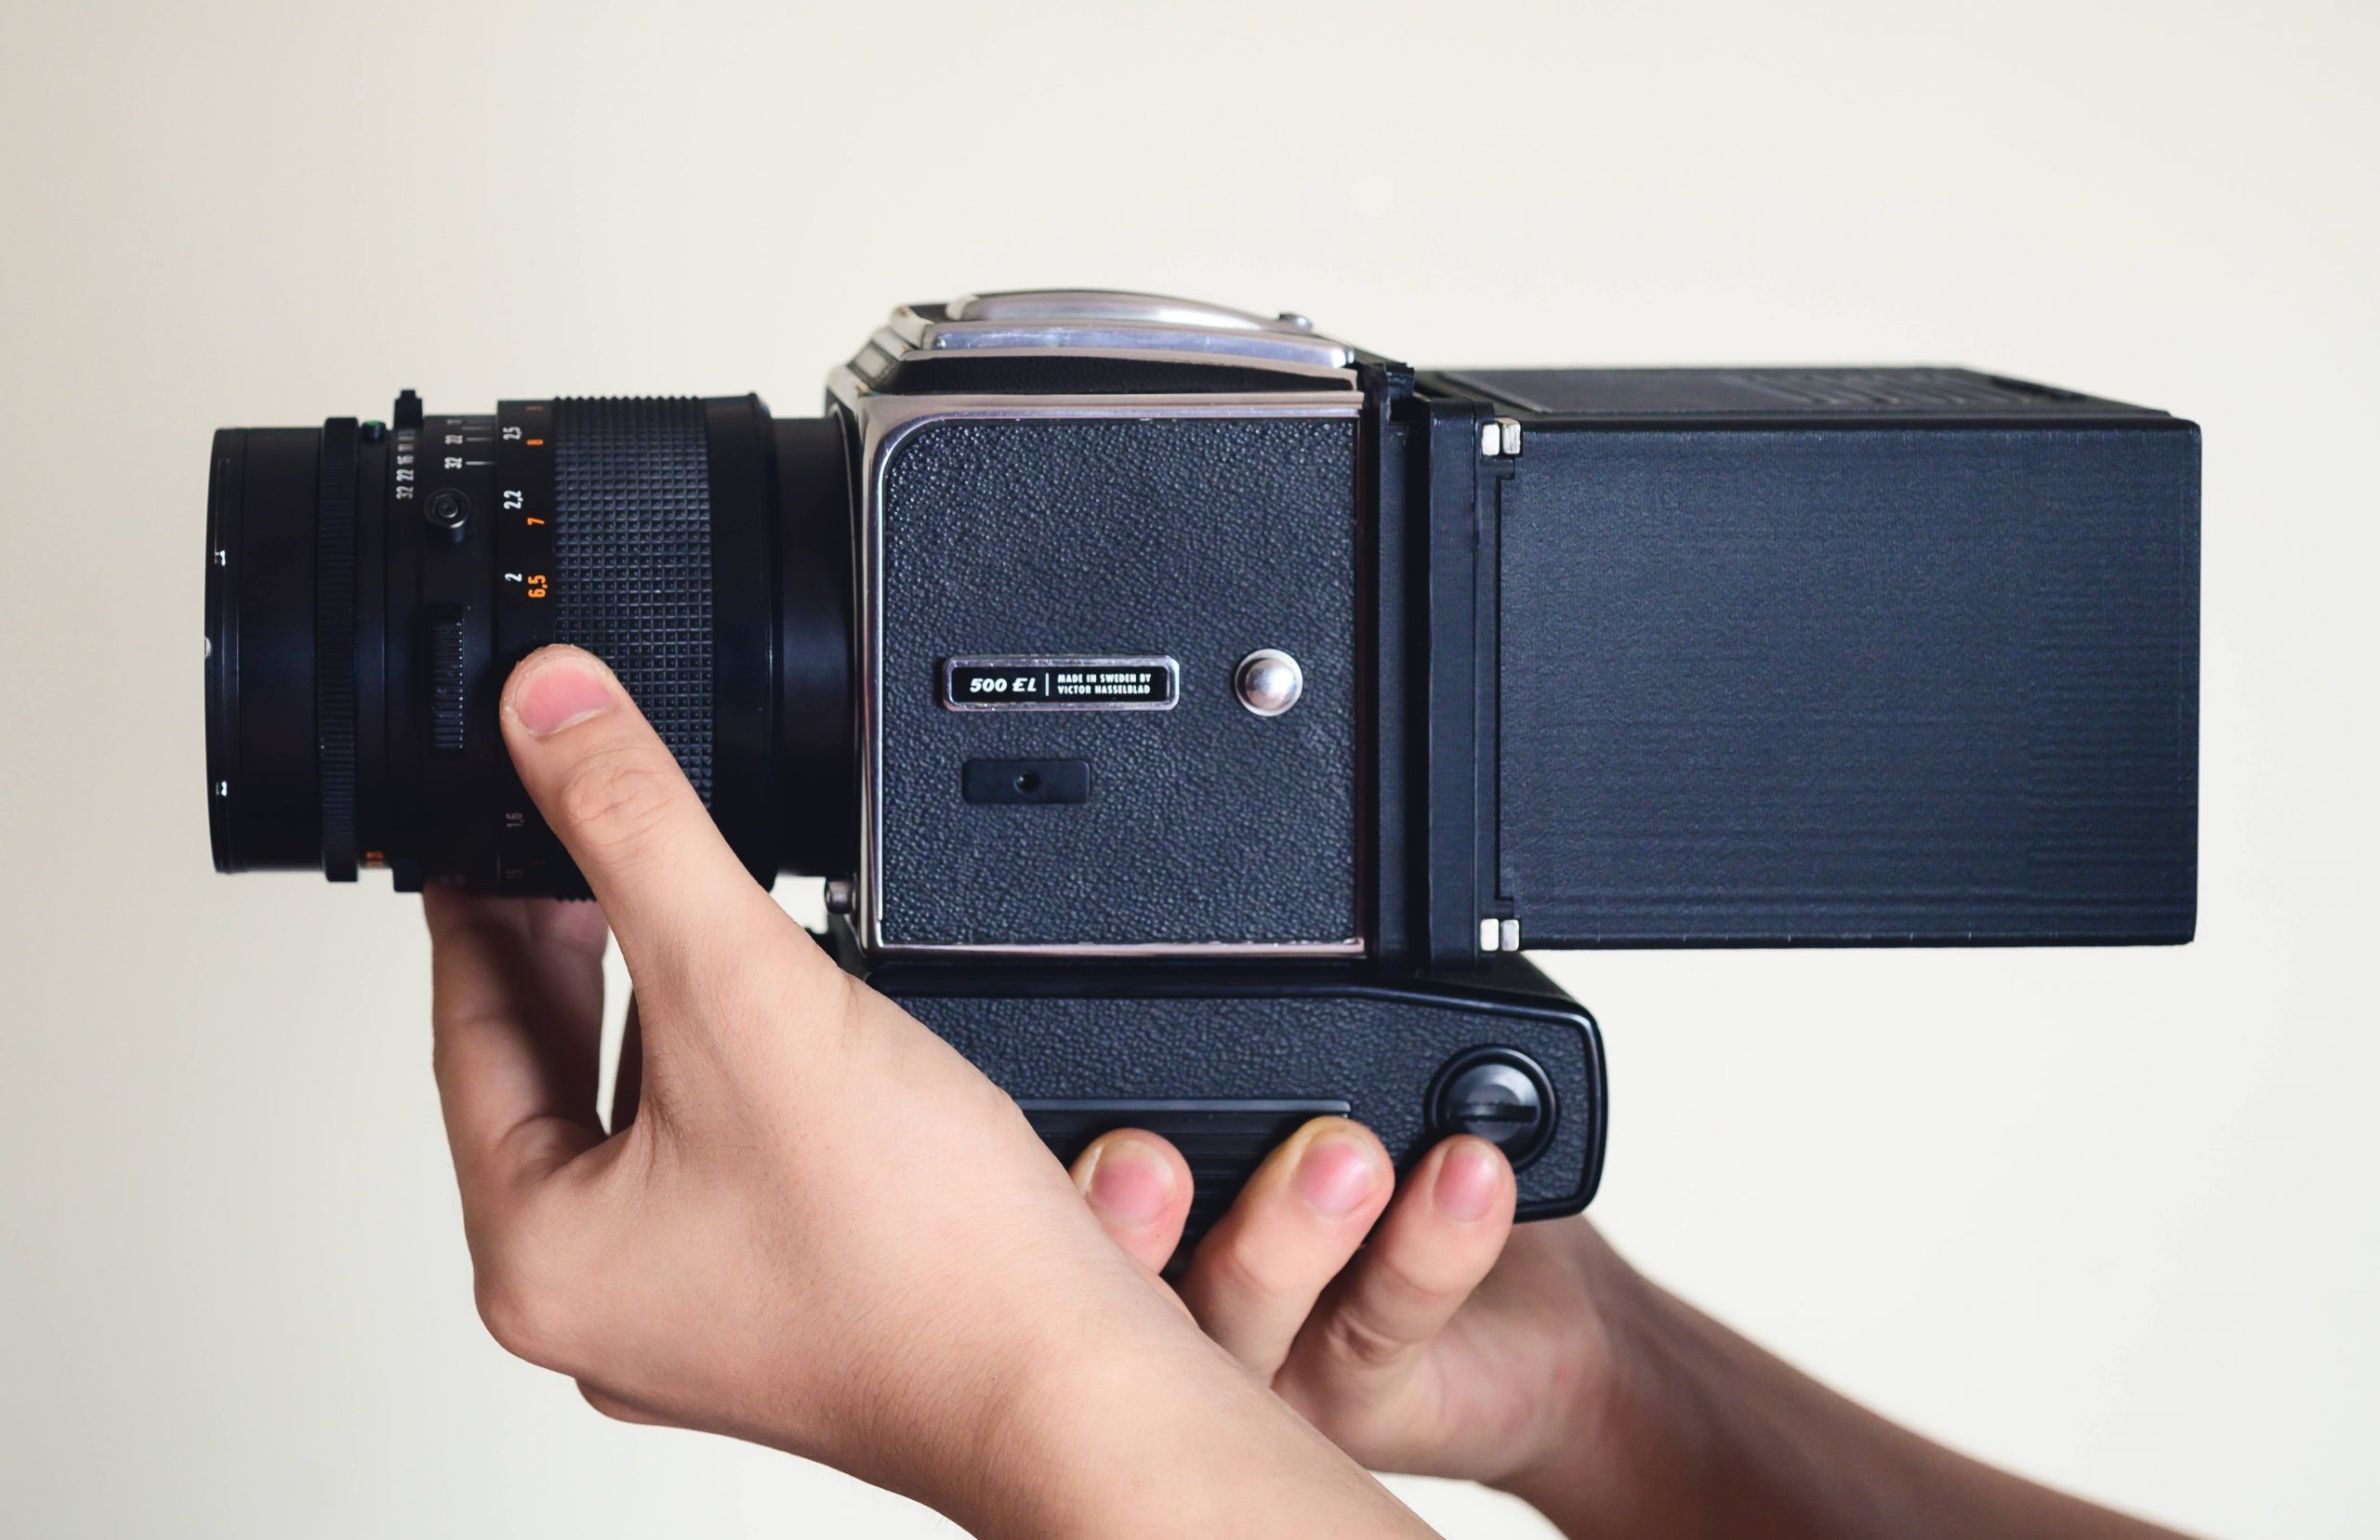
The SLR’s optical path—comprising the lens, mirror, focusing screen, pentaprism, eyepiece, and film plane—introduces multiple potential error points. Slight discrepancies between the viewfinder image and actual film-plane projection often plague poorly manufactured entry-level SLRs.
The most overlooked culprit is the reciprocating mirror: its return position isn’t perfectly consistent! Quality SLRs maintain mirror repositioning errors within 0.03mm—negligible for photography—but cheaper models exhibit greater variance. This also explains why pressing the mirror manually for cleaning is strictly discouraged: permanent deformation of its support mechanism will inevitably cause front/back focusing issues.
Basic SLR Viewfinder Optical Path – Potential Focus Error Sources
While rangefinders have a fixed baseline (distance between viewfinder and rangefinder windows), an SLR’s “baseline” is more complex. Consider early 50mm f/2 SLR lenses with ~25mm entrance pupil diameters—smaller than the 40mm baselines of premium rangefinders. This made SLRs less precise with wide/normal lenses.
However, SLRs gain an advantage with telephotos: the magnified viewfinder image allows reasonably accurate focusing, whereas rangefinders struggle with tiny, detail-less patch images at long distances—compounded by increased mechanical margin for error.
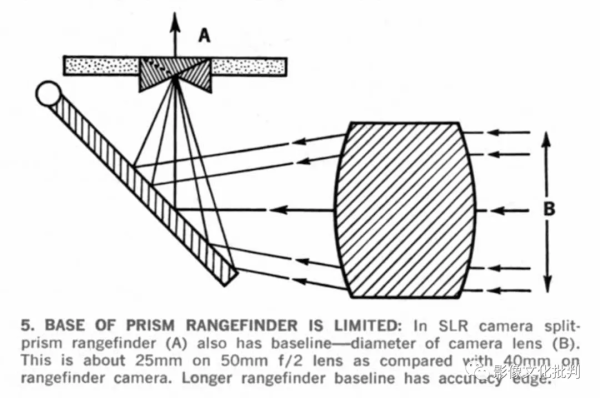
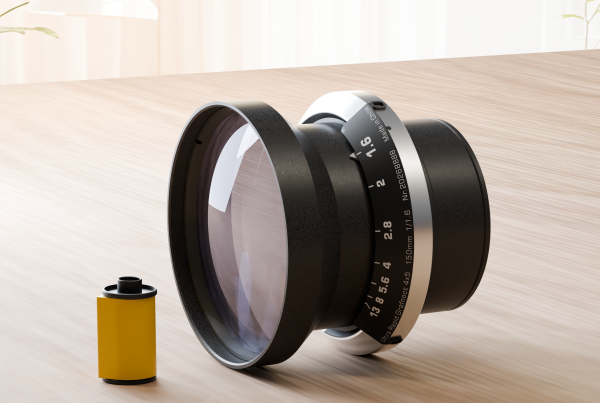
The Lens’ Optical Aperture Determines the SLR’s Focusing Baseline Length
Of course, this is only the ideal scenario—reality is worse.The split-image focusing prism in an SLR does not utilize the lens’s full aperture for focusing (you can test this yourself: whether the lens is wide open or stopped down, the viewfinder’s focus misalignment remains similar when slightly out of focus). This makes it more difficult for the human eye to judge precise focus.
The split-image focus area doesn’t actually utilize the full optical aperture.
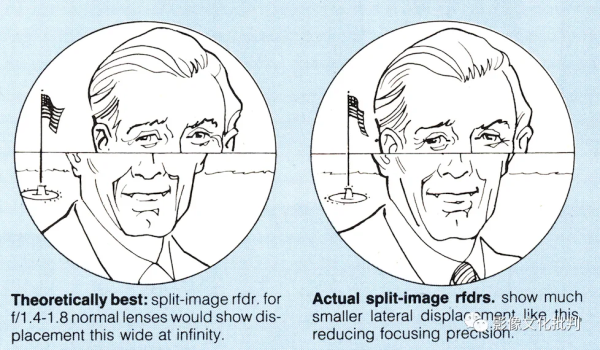
Imagine this: the actual focus might be off by a full meter, but because the viewfinder’s feedback is unclear, the photographer ends up capturing an out-of-focus image without realizing it.
Moreover, SLR focusing screens inherently carry their own margin of error.The split-image focusing screen struggles with low-contrast subjects compared to traditional rangefinder patches, presenting greater difficulty in achieving precise focus. More critically, many split-image screens suffer from manufacturing inaccuracies, introducing additional errors that degrade focusing precision.
Injection-molded focusing screens particularly struggle to maintain split-image prism tolerances – a key reason why the Olympus OM-1’s focus accuracy fell short of competing systems.
If the focused point aligns perfectly with the split-image focusing screen, the camera’s focus functions correctly (left image). However, if the lens achieves focus but the optical axis does not enter the split-image prism at a perfectly perpendicular angle—yet still falls within the split-image zone—the viewfinder will display a misaligned image rather than the expected half-blackout. In this scenario, the result is an out-of-focus photograph.
Enhancing Focusing Screen Brightness
Fast lenses cannot directly improve focusing accuracy, but they do increase viewfinder brightness—a critical factor for achieving precise focus, as a clearer image aids judgment. That said, beyond the lens itself, viewfinder brightness has always been a key concern.
Early SLRs relied on silver-coated pentaprisms and condenser lenses to boost brightness, but these measures were insufficient. Demands like small-aperture telephoto photography or specialty low-light shooting required exceptionally bright viewfinders. Nikon and Canon, aiming to meet photojournalists’ needs, pushed the limits to ensure split-image screens remained functional even with extreme lenses like 500mm f/8—eliminating the dreaded blackout effect, a remarkable feat for its time.
During the 1960s–70s, Japanese manufacturers began replacing Exakta-style bulky glass condensers with thinner Fresnel lenses. While early versions still showed visible Fresnel patterns, continuous brightness improvements eventually minimized this issue. Later innovations integrated condensers, Fresnel lenses, and pentaprisms, yielding significantly improved viewfinder performance.
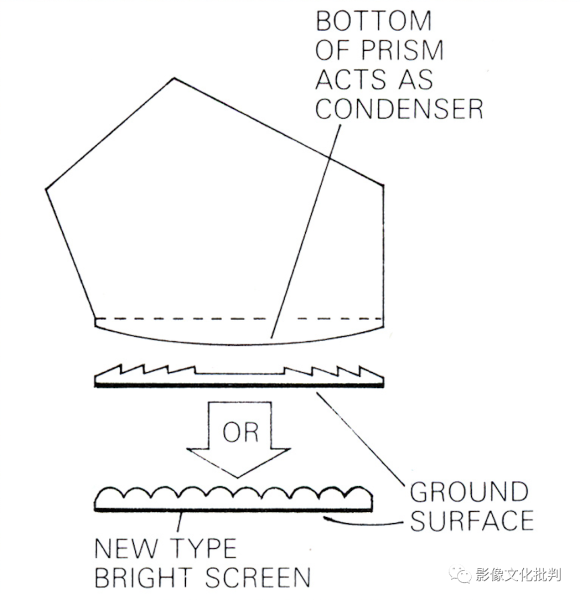
The curved surface at the base of the pentaprism serves as the condenser lens. When combined with a Fresnel lens or bright screen at the bottom, this configuration significantly enhances viewfinder brightness and clarity.
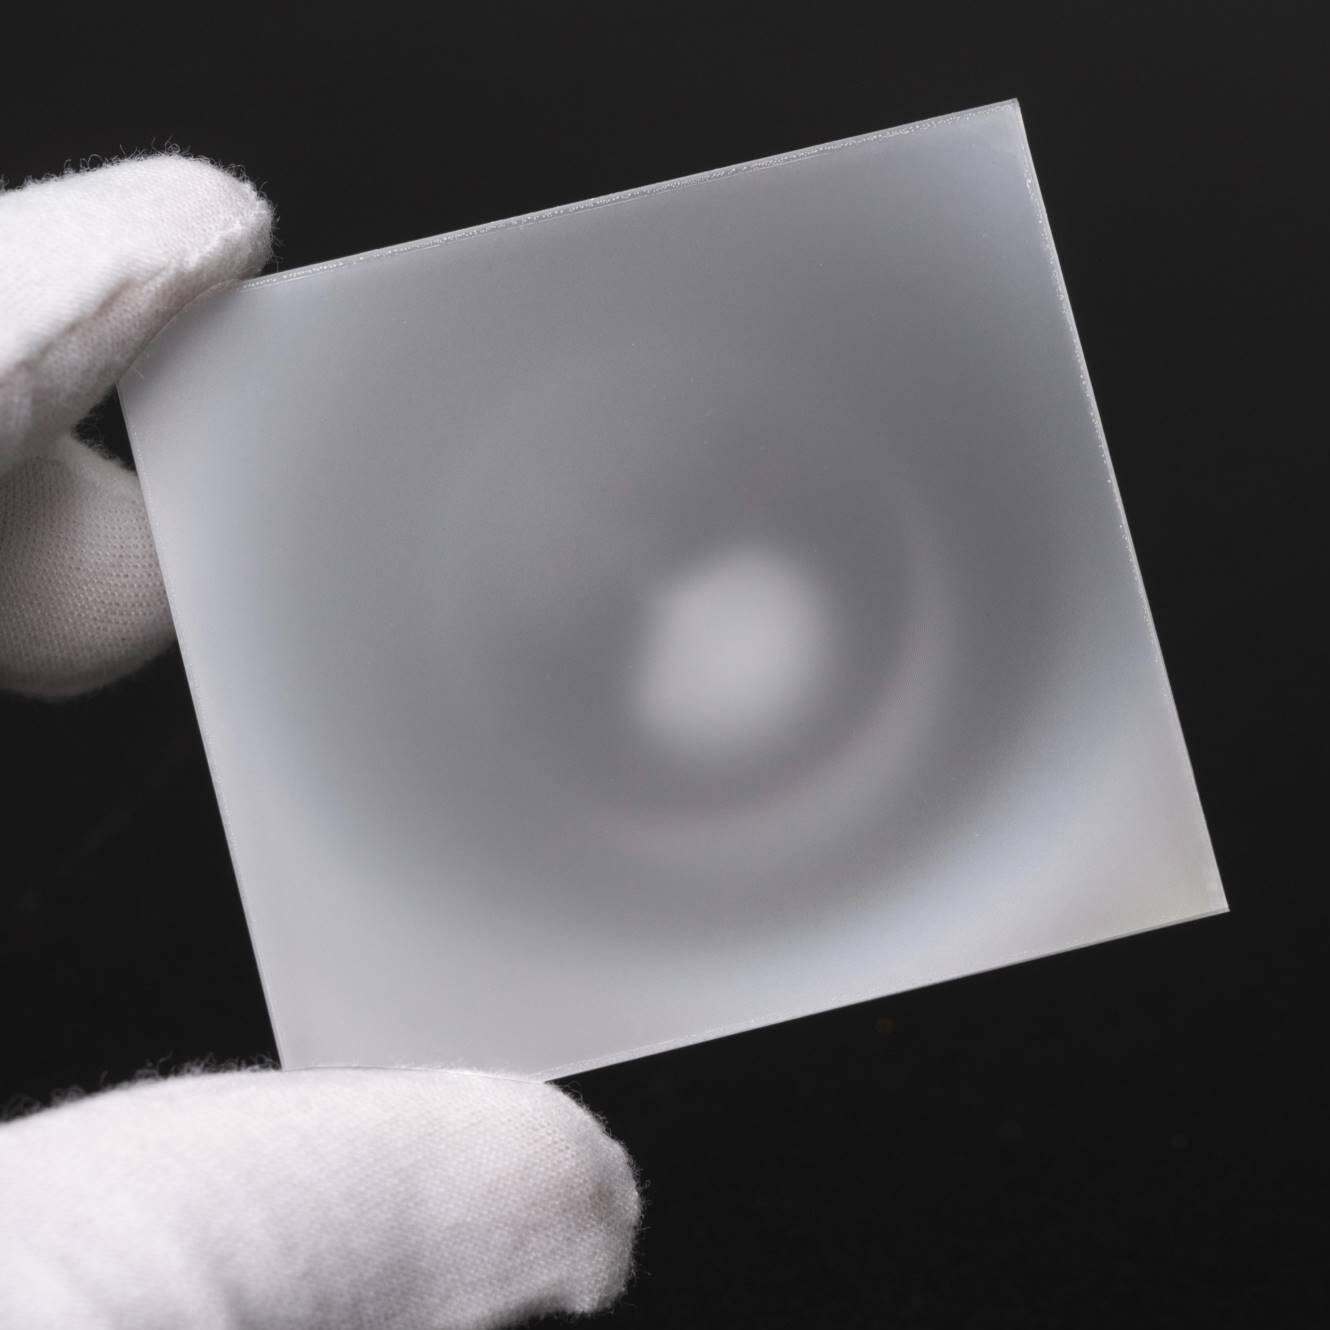
After optimizing these components, manufacturers turned their attention to the focusing screens themselves, all working to reduce light scattering. By this point, Nikon’s focusing screens were already over 20% brighter than competing products, while Minolta’s Acute-Matte screen, with its 2.5 million tiny honeycomb-shaped conical structures, improved brightness by a full 50%.
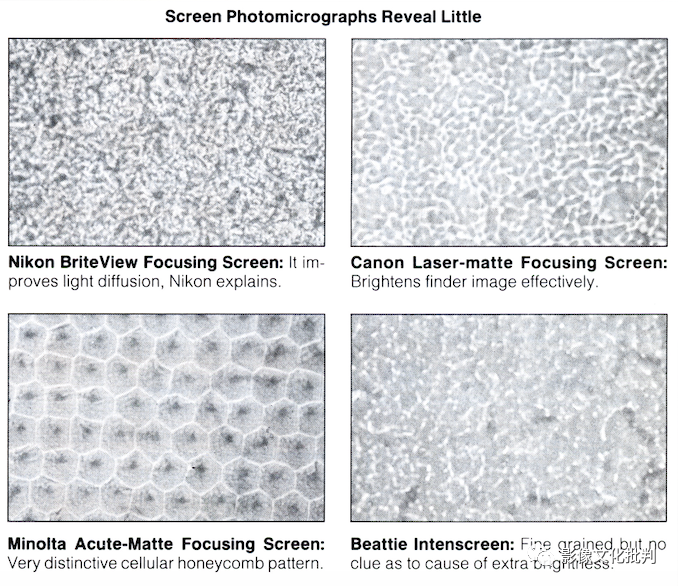
Test data shows manufacturers were aggressively pursuing solutions to prevent split-image blackout at f/5.6 and even f/8 apertures, with Beattie even advertising a “four-stop brightness increase.” These special texture-based bright screen technologies were used by camera manufacturers well into the digital era.
It’s worth noting that before choosing third-party bright screens, photographers should understand their camera’s structure, as many models place their light metering after the focusing screen or even behind the viewfinder. Changing focusing screens might affect metering accuracy on such cameras.
Of course, focusing screens continued to improve with technological advancements. Many bright screens tend to emphasize central brightness, which some criticize as cutting corners. However, the reality is: the human eye is more sensitive to central brightness improvements, and appropriately limiting the central bright area won’t affect light meter readings – achieving the best of both worlds.